The secret to getting stronger with limited time isn’t just doing compound lifts; it’s mastering the technical details that unlock their true efficiency and safety.
- Choosing the right deadlift stance for your body can directly reduce lower back stress and increase power.
- Minor adjustments to your elbow position during a bench press dramatically reduce shoulder injury risk and improve force transfer.
- Progress isn’t just about adding weight; it’s about smart strategies like adding reps or improving technique when you hit a plateau.
Recommendation: Instead of just going through the motions, focus on one technical cue from this guide in each of your next workouts to build a more resilient and effective foundation for strength.
As a busy parent, your time is your most valuable asset. Finding 45 minutes for a workout, three times a week, is already a victory. The common advice you hear is to focus on « compound lifts »—squats, deadlifts, and bench presses—because they’re efficient. While true, this advice often stops there, leaving you with a list of exercises but no real strategy. You’re told to focus on « good form, » but what does that actually mean when your shoulder aches after benching or your lower back feels tweaky after squats?
The fitness world is full of generalities. You’re told to be consistent and lift heavy, but no one explains how to navigate the inevitable plateaus or what to do when a movement just doesn’t feel right for your body. This leads to frustration, stalled progress, and worst of all, injuries that can sideline you for weeks, completely derailing your hard-earned routine. The problem isn’t the exercises themselves; it’s the lack of detailed, practical guidance on how to execute them for your unique body and schedule.
But what if the key to unlocking a truly time-efficient and injury-proof strength routine wasn’t just *doing* compound lifts, but mastering the specific technical nuances that make them so powerful? The real secret isn’t just picking the « right » exercises, but understanding the biomechanics behind them. It’s about learning to make small, deliberate adjustments that maximize muscle recruitment and minimize joint stress, turning every limited session into a potent stimulus for growth.
This guide is designed to be your personal coaching manual. We will move beyond the basics and dive into the critical details that transform a good workout into a great one. We’ll explore how to choose the right deadlift stance for your hips, protect your shoulders during the bench press, understand what « butt wink » really means for your spine, and implement smart progression strategies so you never waste a workout again. Get ready to train smarter, not just harder.
This article provides a detailed roadmap to mastering compound exercises for maximum efficiency. Below is a summary of the key technical points and strategies we will cover to help you get the most out of every minute in the gym.
Summary: Mastering Compound Lifts for Maximum Efficiency
- Conventional vs Sumo Deadlift: Which Style Suits Your Hip Structure?
- Elbow Tuck: How to Protect Your Shoulders While Bench Pressing Heavy?
- Butt Wink: Is It Dangerous for Your Lower Back at the Bottom of a Squat?
- Standing vs Seated Press: Which Builds More Core Stability?
- Linear Progression: How to Add Weight Every Week Without Stalling?
- Farmer’s Walks: How Carrying Heavy Weights Improves Posture and Grip Strength?
- Deload Weeks: When Should You Take a Break to Resensitize Muscle Growth?
- How to Start Functional Training to Improve Mobility for Daily Life?
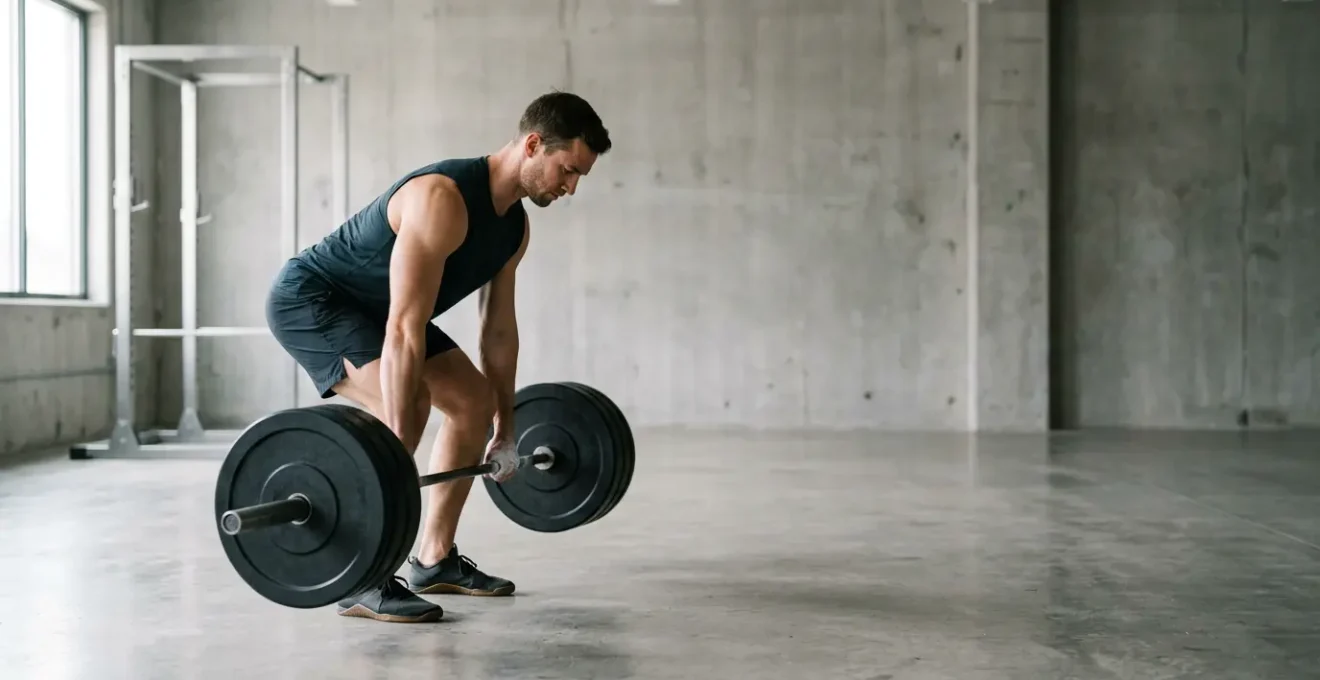
Conventional vs Sumo Deadlift: Which Style Suits Your Hip Structure?
The deadlift is the king of total-body exercises, but choosing between the conventional and sumo stance isn’t just a matter of preference; it’s about biomechanical compatibility. Your individual hip structure and limb lengths largely dictate which style will be stronger and safer for you. The conventional deadlift, with its narrow stance, demands more from your spinal erectors and hamstrings. The sumo deadlift, with its wide stance and more upright torso, places greater emphasis on the quads and glutes.
For many lifters, especially those with shorter torsos or hip sockets that allow for more external rotation, the sumo stance is a game-changer. The upright posture significantly reduces the shearing forces on the lower back. In fact, a 2025 biomechanical analysis shows that the sumo style can reduce the required lumbar extensor torque by 25-35% compared to conventional. This makes it a potentially safer option for individuals prone to back strain, allowing them to train the powerful hip and leg muscles with less risk.
Ultimately, the « best » stance is the one that allows you to maintain a neutral spine, generate maximum force, and train pain-free. Experimenting is key. Don’t feel pressured to use a certain style because it’s what others are doing. Listen to your body and choose the variation that aligns with your unique anatomy. The right choice will not only boost your performance but also ensure your longevity in training.
Action Plan: Find Your Optimal Deadlift Stance
- Mobility Test: Stand with feet at a wide sumo width and squat down. If your hips feel open and strong, sumo is a good candidate. If you feel a pinching sensation in the front of your hips, conventional is likely a better fit.
- Trial Period: Dedicate 4-6 weeks to each stance, using submaximal weights (around 70-80% of your best pull). Pay attention to which feels more natural, powerful, and repeatable.
- Weak Point Assessment: If you have weaker quads, the shorter range of motion in the sumo deadlift may be beneficial. If your back or glutes are a weak point, the conventional deadlift is a more potent builder for those areas.
- Prioritize Consistency: Choose the stance that matches your body and allows you to train consistently without pain. The best deadlift is the one you can perform safely week after week.
- Form Over Ego: Regardless of stance, focus on maintaining a flat back and driving with your legs. Don’t choose a stance just because you can lift more weight with poor form.
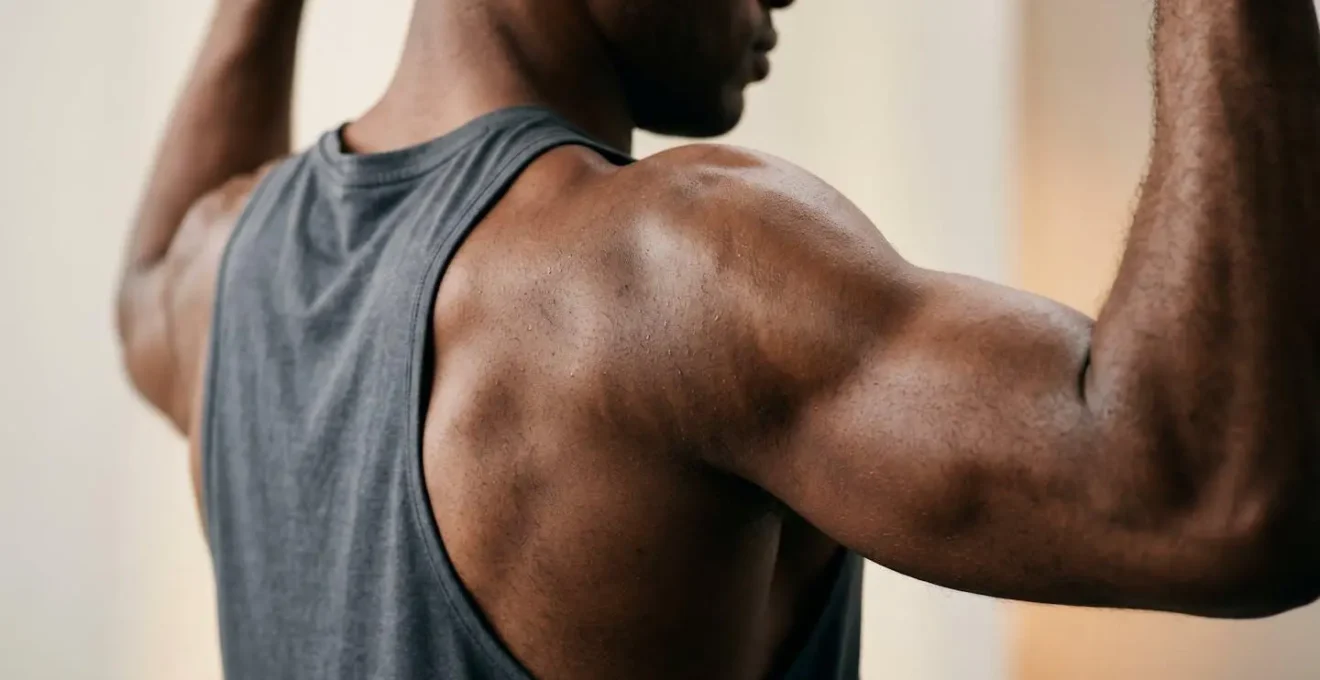
Elbow Tuck: How to Protect Your Shoulders While Bench Pressing Heavy?
The bench press is a staple for upper body strength, but it’s also notorious for causing shoulder pain. The most common culprit is flaring the elbows out to a 90-degree angle from the torso. This « bodybuilder style » press places the delicate shoulder joint in a compromised, internally rotated position, putting immense stress on the rotator cuff and surrounding ligaments. For a time-crunched parent, an injury here is a disaster, impacting not just your workouts but daily life activities like lifting your child.
The solution is the « elbow tuck. » By tucking your elbows to a 45-75 degree angle relative to your torso, you shift the stress from the vulnerable shoulder joint to the powerful pectoral and triceps muscles. This small adjustment creates a much more stable and powerful pressing position. It aligns the bones of the arm for optimal force transfer, protecting the shoulder capsule. The difference is significant; a 2024 clinical review found that flaring the elbows increases shoulder injury risk by 58% in bench press movements.
This concept of efficient force transfer is best articulated by Dr. Jordan Feigenbaum, a physician and strength coach, who explains the goal of proper technique:
The ideal amount of adduction produces a vertical forearm when viewing the lifter from the front and profile views. This represents the most efficient way to transfer force from the shoulder girdle, through the arms, and to the barbell.
– Dr. Jordan Feigenbaum, BarBend
Think of it like this: your arms should form an arrow shape with your torso, not a « T ». Mastering the elbow tuck is non-negotiable for anyone who wants to bench press heavy and stay healthy for the long haul. It is the single most important technical cue for shoulder longevity.
As you can see, a tucked elbow position allows the scapula (shoulder blade) to remain retracted and stable on the bench, creating a solid platform from which to press. This stability is the foundation of a strong and safe press, ensuring the load is handled by your muscles, not your joints. It’s a small change that yields massive returns in both performance and injury prevention.
Butt Wink: Is It Dangerous for Your Lower Back at the Bottom of a Squat?
« Butt wink »—the term for when the pelvis tucks under at the bottom of a squat, causing the lower back to round—is one of the most feared and misunderstood phenomena in strength training. For years, conventional wisdom has screamed that any rounding of the lumbar spine under load is a one-way ticket to a disc herniation. This fear often causes lifters to cut their squats high, sacrificing significant muscle development in the legs and glutes to avoid it.
However, the modern understanding, backed by physical therapists and biomechanists, is far more nuanced. While excessive rounding under a maximal load is certainly not ideal, a small amount of pelvic tuck is a natural and often unavoidable consequence of deep hip flexion for many individuals. It’s often caused by anatomical structure (e.g., the shape of your hip sockets) or ankle mobility limitations, not necessarily a « flaw » in your technique. The key is the degree of flexion and whether it occurs under load.
This perspective is powerfully articulated by physical therapist Sam Surdyka, who directly challenges the long-held dogma:
There is no evidence to suggest that a butt wink during a squat is harmful. There is not even research indicating that flexion of the low back during a squat puts you at a greater risk of injury.
– Sam Surdyka, Physical Therapist, BarBend
This doesn’t mean you should ignore form. The goal is still to maintain as neutral a spine as possible. You can work on improving ankle and hip mobility, experiment with your stance width, and focus on bracing your core to create intra-abdominal pressure. However, you shouldn’t live in fear of a small, unloaded butt wink at the very bottom of your squat. For many, it’s a natural part of achieving full depth. Focusing on controlled movement and a rigid torso throughout the majority of the lift is far more important than obsessing over a few degrees of pelvic tilt in the deepest position.
Standing vs Seated Press: Which Builds More Core Stability?
The overhead press is a premier shoulder and upper-body builder. The choice between performing it standing or seated, however, fundamentally changes the nature of the exercise. The seated press, with your back supported by a bench, isolates the deltoids. This allows you to lift heavier weight, which is great for pure muscle hypertrophy. But it takes a critical component out of the equation: your core.
The standing overhead press transforms the lift from an isolation movement into a full-body exercise. To press a heavy weight overhead without arching your back, you must aggressively brace your entire core—your abs, obliques, and lower back—as well as your glutes and quads. It teaches you to transfer force from the ground up through your entire kinetic chain. This has far greater carryover to both athletic performance and the demands of daily life, like lifting a heavy box onto a high shelf. Research confirms this; a study in the Journal of Strength and Conditioning Research demonstrated that the standing press elicits significantly greater core muscle activation than the seated version.
For the time-crunched parent, the choice is clear. The standing press offers more « bang for your buck, » training your shoulders and core simultaneously. While you may lift slightly less weight, the development of total-body stability and functional strength is a far more valuable return on your limited training time. The following table breaks down the key differences:
| Metric | Standing Press | Seated Press |
|---|---|---|
| Deltoid Activation | High (all three heads) | Moderate (reduced posterior) |
| Core Engagement | Significant (abs, obliques, erectors) | Minimal |
| Maximum Load Capacity | Lower (stability limiting factor) | Higher (bench support allows heavier weight) |
| Functional Transfer | High (mimics real-world overhead movements) | Low (isolated shoulder hypertrophy) |
| Injury Risk (with proper form) | Moderate (requires strong core) | Low (back supported) |
| Best For | Athletic performance, total-body strength | Deltoid hypertrophy, beginners, shoulder isolation |
Unless you have a specific reason to isolate your shoulders or a medical condition preventing you from standing, the standing overhead press should be your default choice for building resilient, functional strength.
Linear Progression: How to Add Weight Every Week Without Stalling?
Linear progression is the simplest and most effective way for a beginner to get strong. The principle is straightforward: add a small amount of weight to the bar every workout. For a busy parent on a three-day-a-week program, this means that every week, you should be lifting more than the last. This consistent, incremental overload is a powerful signal that forces your body to adapt by building more muscle and strength. For a while, this works like magic.
But inevitably, you will hit a wall. You’ll go for your target of five reps and only manage four. The weight that felt manageable last week suddenly feels impossibly heavy. This is where most people get frustrated and their progress stalls. They mistakenly believe linear progression has stopped working, when in reality, they just need to think about « progression » more broadly. Adding weight is not the only way to progress.
When adding the smallest plates (e.g., 2.5 kg or 5 lbs) becomes too big of a jump, it’s time to get creative with micro-progressions. These smaller steps keep the momentum going and prevent the psychological defeat of a failed lift. Instead of fighting a weight you can’t lift, you can use these strategies to continue making gains and break through plateaus:
- Use Micro-Plates: Invest in small plates (0.5kg or 1.25lb). A 1kg jump is much more achievable than a 5kg jump, especially on upper body lifts.
- Add Reps: If you’re stuck at 100kg for 5 reps, aim for 6 reps next time. Once you can hit 8 reps, you’ll likely be strong enough to increase the weight and drop back to 5 reps.
- Increase Density: Keep the weight and reps the same, but reduce your rest time between sets. Doing the same amount of work in less time is a form of progression.
- Perfect Your Technique: Film your lifts. Often, a small form breakdown is what’s holding you back. Fixing your technique can instantly « unlock » more strength.
- Use a Top Set/Back-Off Model: Perform one heavy set at your current max effort, then reduce the weight by 10-15% for your remaining sets to accumulate volume without burning out.
Thinking of progression as a multi-faceted toolbox rather than a single hammer is the key to long-term, sustainable progress. When one method stops working, you simply switch to another until you’re ready to add full plates to the bar again.
Farmer’s Walks: How Carrying Heavy Weights Improves Posture and Grip Strength?
In the quest for time-efficient exercises, the Farmer’s Walk is an unsung hero. Its beauty lies in its simplicity: pick up two heavy objects and walk. While it may look straightforward, this single movement is a full-body assault that builds monstrous grip strength, a rock-solid core, and resilient, upright posture. For a parent who spends hours hunched over a desk or carrying a child on one hip, the postural correction from Farmer’s Walks is invaluable.
When you carry heavy weights, every step is a battle against gravity and momentum. Your upper back muscles must fire constantly to keep your shoulders from rounding forward, directly combating the slouched posture of modern life. Your core works overtime as a dynamic stabilizer, preventing your torso from bending or twisting with each stride. And, of course, your hands, wrists, and forearms are working relentlessly to hold onto the weights. This develops what is known as « supporting grip »—the ability to hold a heavy object for an extended duration.
Supporting grip is arguably the most critical type of grip strength for heavy lifting, as it’s what allows you to hold onto a heavy deadlift or complete a high-rep set of rows without your hands giving out first. The Farmer’s Walk is the most direct way to train it. Understanding the different types of grip clarifies why this exercise is so effective:
- Crushing Grip: The force of closing your hand, like a firm handshake.
- Pinching Grip: The force between your thumb and fingers, like holding a weight plate by its edge.
- Supporting Grip: The endurance to hold a heavy object without it slipping. This is precisely what Farmer’s Walks build, and it has direct carryover to your ability to control and lift heavy barbells.
By integrating Farmer’s Walks as a finisher at the end of your workouts, you are not only building a vice-like grip but also reinforcing the upright posture and core tension that are fundamental to every other compound lift you perform. It’s a low-skill, high-reward movement that provides a massive return on investment for total-body strength and resilience.
Key Takeaways
- True efficiency in strength training comes from mastering technical details, not just performing a list of exercises.
- Small adjustments in form, like elbow tuck and deadlift stance, have a massive impact on both safety and performance.
- Progress is multifaceted; when you can’t add weight, focus on adding reps, improving technique, or increasing training density.
Deload Weeks: When Should You Take a Break to Resensitize Muscle Growth?
In a culture that glorifies « the grind, » taking a planned break can feel counterintuitive. For a busy parent with limited training time, the idea of a « deload week »—a period of intentionally reduced training intensity and volume—might even seem like a waste. The reality is the exact opposite. A strategic deload is one of the most powerful tools you have to prevent burnout, mitigate injury, and ensure long-term progress. It’s the « sharpening the saw » of strength training.
Consistent, hard training accumulates fatigue not just in your muscles, but in your joints, connective tissues, and central nervous system (CNS). This is called systemic fatigue. Over time, this accumulated stress blunts your body’s ability to adapt and grow. You become less sensitive to the training stimulus. A deload week allows this systemic fatigue to dissipate, healing nagging aches and « resensitizing » your body to hard training. When you return, you’ll feel physically and mentally refreshed, and the same workouts that felt grinding before will now feel productive again.
The question isn’t *if* you should deload, but *when*. You don’t have to schedule one every fourth week like a professional athlete. Instead, learn to listen to your body and recognize the objective signs that you need a break. Ignoring these signs is a fast track to overtraining and injury. Here are the key indicators that it’s time to pull back for a week:
- Persistent Joint Aches: Nagging pain in your knees, elbows, or shoulders that doesn’t go away with a single rest day.
- Lack of Motivation: A sudden and noticeable drop in your desire to train. Workouts feel like a chore, not a challenge.
- Stalled Progress: You’ve been stuck on the same weights for two or more weeks, despite good sleep and nutrition.
- Elevated Resting Heart Rate: Your morning heart rate is consistently 5-10 beats per minute higher than your normal baseline.
- Disrupted Sleep: You feel physically exhausted but have trouble falling asleep or staying asleep.
During a deload week, you can reduce your working weights by 40-50% or cut your total number of sets in half. You’re not trying to make progress; you’re actively facilitating recovery. This planned break is an investment that pays massive dividends in consistency and longevity.
How to Start Functional Training to Improve Mobility for Daily Life?
The ultimate goal of strength training, especially for a busy parent, isn’t just to lift heavy numbers in the gym. It’s to build a body that is strong, resilient, and capable of handling the physical demands of everyday life with ease and without pain. This is the core principle of functional training. As Certified Personal Trainer Lindsey Bomgren puts it, it’s about preparing you for real-world movement.
Compound exercises are a form of functional strength training, building strength for the motions you perform every day, such as pressing, pushing, lifting and twisting. These multi joint exercises work more muscles at one time, giving you more bang for your buck in a short period of time.
– Lindsey Bomgren, Certified Personal Trainer, Nourish Move Love
Instead of thinking about training « chest day » or « leg day, » functional training encourages you to think in terms of fundamental human movement patterns. Your body doesn’t know what a « bicep curl » is; it knows how to pull. It doesn’t know what a « leg extension » is; it knows how to squat. By focusing your limited gym time on mastering these core patterns, you are building strength that directly translates to carrying groceries, lifting your child, or moving furniture.
All compound lifts are simply loaded expressions of these fundamental movements. Your entire strength program can and should be built around them. By ensuring you are proficient in each, you build a balanced, functional, and injury-resistant body. These five patterns are the blueprint for a truly effective routine:
- 1. Squat: This is the pattern of sitting down and standing up. It’s essential for everything from getting out of a chair to picking something off the floor. It is trained with Goblet Squats, Front Squats, and Back Squats.
- 2. Hinge: This is the hip-dominant pattern of bending over to lift something heavy. Mastering the hip hinge with a flat back is the key to protecting your spine. It is trained with all variations of Deadlifts, Romanian Deadlifts, and Kettlebell Swings.
- 3. Push: This involves pushing objects away from you, either horizontally (like pushing a door) or vertically (like placing luggage overhead). It is developed through the Bench Press, Overhead Press, and Push-ups.
- 4. Pull: This is the motion of pulling objects toward you or pulling your own body up. It is built with all types of Rows, Pull-ups, and Lat Pulldowns.
- 5. Carry: This is the simple act of carrying a heavy load, which builds total-body stability and postural endurance. It is perfected through Farmer’s Walks and other loaded carries.
By building your three weekly workouts around these five patterns, you guarantee that you are not just getting stronger in the gym, but building a body that is more capable and resilient for the life you live outside of it.
Now that you’re armed with the technical knowledge to make your workouts safer and more effective, it’s time to put it into practice. Start by focusing on one key takeaway—like the elbow tuck or core bracing—in your next session. Building strength is a marathon, not a sprint, and these foundational skills are your key to long-term, injury-free success.